Wednesday, April 26, 2017

Crate Paper | Hello Girl

I'm here today to share a new layout with you using the Cute Girl collection from Crate Paper!  Things have been in disarray around our house for the past couple of weeks.  We decided to close in our dining room to create a 4th bedroom, we've had new flooring going down and new furniture coming in.  Currently, my computer and scrapbook supplies are all on the floor of the bedroom, waiting for new craft room furniture!  So with all of that said, I needed to create a quick and easy layout for today.  That meant no cut files and new sewing with my sewing machine.


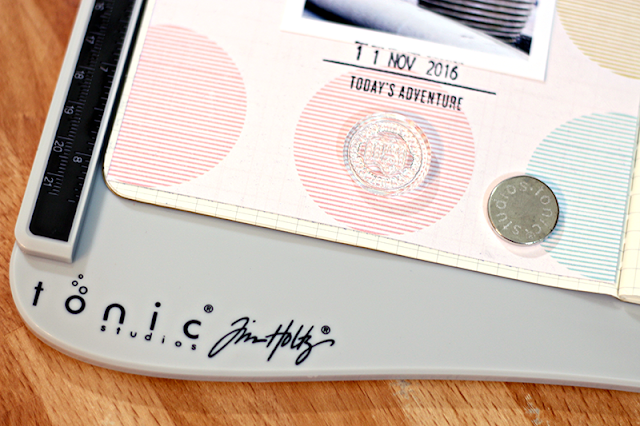
I decided the Be You patterned paper would be a great way to add interest to my layout, without all of the bells and whistles I normally use.  I love that this paper has a fun grid design, but that it's a random grid pattern, with different sizes.  The squares and rectangles are perfect spots for adding embellishments.


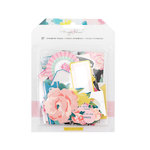
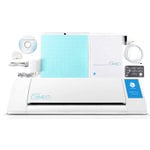
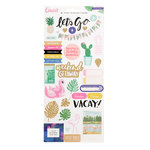
My printer is also out of commission right now, so I used my SP2 pocket printer to print the photo.  I printed it in black & white because I love the contrast it creates with all of the bright, happy colors in the Cute Girl collection.  I used a mix of the Ephemera Pieces, Stickers, Puffy Stickers and Chipboard to embellish the layout.

   
Another great thing I forgot to mention about this layout...it only took between 30-40 minutes to complete!  I love the way it turned out, even without some machine stitching, which was really hard for me to leave off!  HA!

Monday, April 17, 2017

Crate Paper | Dreams Are for Chasing

Crate Paper and florals go together like peanut butter and jelly!  I always love the floral designs that are part of the Maggie Holmes collections.  I thought it would be fun to pair the Chasing Dreams collection, with a large die cut flower, that I could back with a mix of patterned papers.


The cut file is a design by Paige Evans and I used it two ways.  I cut the design from White card stock, and flipped it to trace it onto the right side of the background paper, before filling the open spaces with patterned paper.  Once I had all of the design backed with papers from the Chasing Dreams 6x6 paper pad, I adhered it to the background paper and lined it up with the traced pencil line.  Then I punched holes with my paper piercer and stitched over the pencil line.

I placed my photo on the right side of the flower, to fill in the open space.  I loved the effect of all of the patterned paper on the left side of the flower and the look of the background paper showing through the right side of the flower.  I used the “Dreams Are for Chasing” sticker for the title of my layout, and placed it right under the photo.


The fringe butterflies are one of my favorite embellishments from the collection, and I thought one would be perfect on a floral themed layout.  I also brought in a couple of other flowers from the Ephemera Pack and the Chipboard sticker sheet to balance the right side of the layout.


I finished the layout with a few smaller embellishments and a few word phrases, to avoid over-filling the layout. I definitely wanted the large flower and patterned papers to be the focus of the design. 

This post contains affiliate links, which means I will receive a small commission from any purchases made from product clicks on this post.
 

PRODUCTS USED:


Tuesday, April 11, 2017

Altenew’s 3rd Anniversary Blog Hop + Giveaway!


Welcome to the Altenew 3rd Anniversary Blog Hop!  There are four awesome days of inspiration and giveaways, that you won't want to miss!  You can follow the links below, to check out the Blog posts that will go up each day.


PRIZES:
Altenew is giving away $50 gift certificates to FIVE lucky winners. There are also 12 awesome companies who are celebrating with us, and they are offering the following prizes:


Be sure to leave comments by Tuesday, April 25, 2017 at 11:59 PM EDT for a chance to win! 21 WINNERS will be chosen at random from the comments left on any of the blogs listed below and will be announced on the Altenew Blog on April 28th, 2017. 

Now, it's time to share my project with you!  You should have arrived here, from the talented Laura Bassen's Blog.  I used the Reflection Scrapbook collection to create a spread in my Traveler's Notebook.


I love that all of the Altenew products can be used for any type of project, whether you are a scrapbooker or cardmaker!  Here's a look at my best projects for Altenew!


SPECIAL OFFER:
FREE U.S. shipping with code HAPPY3RD or $5 OFF international shipping with code ANNIVERSARY at checkout. Offer valid from April 11th through April 16th at 11:59 pm EDT. Not valid on prior purchases. Cannot be combined with other promo codes.

Thanks so much for joining in the Altenew Anniversary Blog Hop! You're off to visit the talented Amy Lee's Blog! In case you get lost along the way, here is a full list of the Blog Hop order for you to follow:


Monday, April 10, 2017

Tim Holtz Stamp Platform


Hey Friends!  I'm excited to stop in today and share a new product with you!  I got a chance to play with the new Stamp Platform from Tim Holtz/Tonic Studios before it's available in stores.  If you're a beginner stamper or a pro, this is a great tool to add to your craft supplies!  It makes stamping single or layered stamps easy peasy!  I used the Stamp Platform with stamps from Christine Herrin to create a new spread in my Traveler's Notebook.


http://www.shareasale.com/r.cfm?B=33184&U=1386704&M=7429&urllink=

http://www.shareasale.com/r.cfm?B=33184&U=1386704&M=7429&urllink=

It's SUPER EASY to use, and here are my top three favorite things about the Tim Holtz Stamp Platform.
  • The grid design makes it easy to place your stamps, so they will be straight on your projects.
  • The MAGNETS!!  These are awesome, and I love that they hold your paper in place while you stamp.  I was even able to use them with my Traveler's Notebook.
  • You can place several stamps at a time and stamp them all at once.  I used Black ink with all of my stamps for this spread, but you could ink each stamp with a different color and have it all stamped at one time.


There are so many fun ways to use the Stamp Platform!  It will be coming soon to Scrapbook.com, so make sure you head over and click NOTIFY ME to receive an email when the item is in stock. 

This post contains affiliate links, which means I will receive a small commission from any purchases made from product clicks on this post.
 

PRODUCTS USED: