This
is a personal blog. All editorial content and projects are
intellectual property of ashleyhortondesigns.com. I do receive
compensation and material product from Crate Paper to develop my craft
posts, but all ideas and opinions are my own.
Happy December 1st!! I'm stopping in today to share a layout for Crate Paper, using the adorable Snow & Cocoa collection! I love that this collection can be used for winter photos and Christmas
layouts. And there are so many cute images included in the collection!
The first thing that caught my eye in this collection, was the fun
reindeer Printed Vellum sheet. I just had to use it! I thought about
the best way to use it for my layout, and I decided to layer it over the
Rosy Cheeks patterned paper. This added a variety of color behind the
reindeer pattern, without taking away from the design. It can be tricky
when you are adding vellum to a layout, because you don’t want any
adhesive showing through the transparent paper. I solved this problem
by adding my adhesive to the vellum where I knew my photo would cover
it. You could also machine stitch the vellum to secure it to your
background paper.
When it came to my photo and embellishments, I kept everything clustered
near the upper left hand corner of the layout. I didn’t want to cover
too much of the vellum paper…because let’s face it, it’s the star of the
layout!! Keeping all of my embellishments and my title clustered near
the photo, also helped the photo stand out from the background design.
I always like to add interest and mix textures with my embellishments,
so I mixed some of the die cut snowflakes from the Ephemera Pack, one of
the wood veneers and some of the cute puffy stickers. I also love the
glitter texture on the snowflake stickers and the touch of Gold it adds
to the layout.
I kept things simple for the title, and used the word Winter from the
puffy stickers pack. I love that each letter included a color from the
collection. Then for contrast, I used the Bright Thickers to add the
word Magic. I really liked the look of the two different sized alphas
in the title and the Black Thickers really popped on the background
paper.
I hope you find some fun ways to use the Snow & Cocoa collection this holiday season!
This
post contains affiliate links, which means I will receive a small
commission from any purchases made from product clicks on this post.
PRODUCTS USED:
This
is a personal blog. All editorial content and projects are
intellectual property of ashleyhortondesigns.com. I do receive
compensation and material product from Crate Paper to develop my craft
posts, but all ideas and opinions are my own.
I don't think I will ever get tired of using the beautiful Crate Paper Gather collection by Maggie Holmes! I wanted to squeeze in one more layout, with the collection for November, and I had the perfect photo from our recent Thanksgiving trip to Texas.
The Joyful patterned paper included in the collection is one of my favorites! I've been waiting for the perfect inspiration to use it, and inspiration finally struck. I decided to use the paper for my full background, but tone it down a bit with some hand cut leaves from a few of the Black & White patterned papers. I used the leaves from the Gather Ephemera pack as a stencil to trace on the Black & White 6x6 papers and then hand cut them with my small scissors. I placed the leaves in a scattered pattern on the background and then machine stitched each one of them.

I put together a quick title for my layout using the Chipboard stickers and the Accent stickers. I almost always like to have my title layered over the photo or very close to the photo. I think it makes the two most important elements on your layout, stand out. The colors from the background paper and the hand cut leaves created a busy look on the layout, so I wanted to keep my embellishing on the simple side. I placed a few of the phrase stickers from the Accent stickers sheet over some of the leaves, and included a heart sticker with each one too.
This layout was quick and easy to put together, and I loved creating the hand cut leaves by tracing the leaves from the Ephemera pack. It's an easy way to reproduce a favorite shape from a collection, and a great way to customize it with the patterned papers you decide to use. I am all for an endless pile of cute, hand cut leaves!
This
post contains affiliate links, which means I will receive a small
commission from any purchases made from product clicks on this post.
PRODUCTS USED:
I am so excited to stop in today and share my first layout, using my newest collection from Pretty Little Studio, Tinsel Town!! The collection arrived the day before we went out of town for the Thanksgiving holiday, so I couldn't wait to sit down and make a layout, our first day back home!
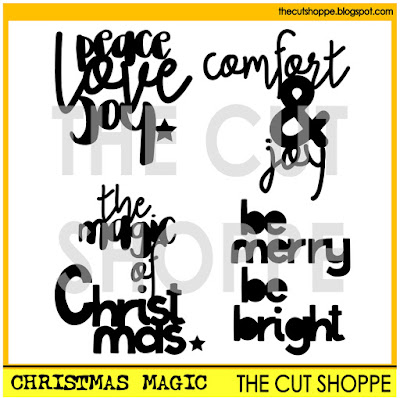
I love using non-traditional Christmas colors, so I knew I wanted a bright, fun color scheme when I created this collection. I also love Wood Grain papers, so I started the layout by cutting my title from the Yule Log patterned paper. I used the new Christmas Magic cut file set from The Cut Shoppe, to create a large title on the layout. Once the title was cut, I added it to a white cardstock background, tilted it a bit and then stitched through it with my sewing machine.

I wanted several textures on the layout, so I used a mix of the Twinkle Acrylics, Twinkle Die Cuts, Wood Veneers, Flair Button and sequins. I love the scattered look of the embellishments and the various dimension created by each one. Since the design of the layout gravitated on the left side of the page, I decided to balance it with some patterned papers from the collection on the right hand side. I cut strips from several of the patterned papers and layered them along the right side of the page. Then I stitched along each one, to bring some texture to the strips.
I hope you've had a chance to pick up some of the Tinsel Town collection from the PLS shop, and that you've found some inspiration today for working with the collection! This is a LIMITED EDITION COLLECTION, so make sure you get it while it's available!
I'm also doing a GIVEAWAY on my Instagram account, so make sure you check it out for the chance to win a selection of the Tinsel Town collection. You can find me on Instagram at @ashleyhorton75.
This
post contains affiliate links, which means I will receive a small
commission from any purchases made from product clicks on this post.
PRODUCTS USED:
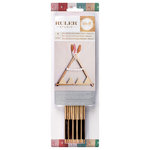
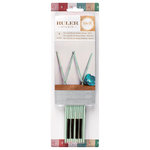
I've had my eye on the Ruler Studio products from We R Memory Keepers for a while, but just haven't had the chance to pick any up. But I wanted to update our Christmas decor some this year, because I feel like I've been putting up the same decorations for the past 10 years! I decided to pick up two of the 9 inch rulers...one in Natural and one in Mint. I used the Natural ruler to create a star design, and placed it on top of the book shelf with some of our other Christmas decor.
I'll have a post coming up in December using the Mint ruler, for a Crate Paper project, so make sure you watch out for that!
You can pick up the Ruler Studio products from the Scrapbook.com website!
This
post contains affiliate links, which means I will receive a small
commission from any purchases made from product clicks on this post.
PRODUCTS USED:
This
is a personal blog. All editorial content and projects are
intellectual property of ashleyhortondesigns.com. I do receive
compensation and material product from Pink Paislee to develop my craft
posts, but all ideas and opinions are my own.
It's Home Decor week on the Pink Paislee Blog, and the Design Team has some great inspiration in store for you! I started things off yesterday, with a Dreamcatcher created with the new Moonstruck collection and an Embroidery Hoop.
The Dreamcatcher trend has been popping up in the paper crafting world, so I thought it would be fun to interpret it into a Home Decor piece. My daughter's love it when I make projects like this and they usually fight over who gets to have it in their room. HA! This time the younger sister won out.
This project was fun and easy to put together. I used a 9″ embroidery
hoop which you can find at your local craft store for a very low price. I
cut a circle from one of the Moonstruck patterned papers to fit behind
the embroidery hoop. You could also do the opposite if you wanted to and
add your circle over the top of the embroidery hoop. Next, I cut a 9″
spiral cut file to layer over the patterned paper before adhering it to
the embroidery hoop.
Once I had the paper adhered to the embroidery hoop, I grabbed the three
feathers from the Moonstruck ephemera pack. I machine stitched through
each of the feathers, leaving a long piece of thread at the top and
bottom of each one. I also die cut two feathers on my Silhouette Cameo
from two different Moonstruck patterned papers and stitched those as
well. Then I hung each feather by placing the thread on the back side of
the patterned paper and securing it with washi tape.
I finished the dreamcatcher design with a few more embellishments from
the Moonstruck ephemera pack and puffy stickers. I added dimension to
the project by stitching through the butterflies and folding the wings
before adhering them to the patterned paper. If you wanted to
personalize your home decor dreamcatcher even more, you could paint your
embroidery hoop before assembling it or even add your favorite ribbon
or trim on the outside edge of the circle.
If you're looking for more inspiring ideas for home decor, make sure you check out the Pink Paislee Blog all this week!
This
post contains affiliate links, which means I will receive a small
commission from any purchases made from product clicks on this post.
PRODUCTS USED:
When
the whole family wears plaid, it calls for a layout! We were off to
church this past Sunday, and I grabbed the selfie stick to snap a photo
before we headed inside. As I got started on the layout, I knew I wanted to
use the Cozy Blanket patterned paper from my Oakley Avenue collection
with Pretty Little Studio, for some die cut leaves from the Leaf It To Me cut file set from The Cut Shoppe!


There was a lot of color going on in the photo, since all of our shirts had different colored plaids. I didn't want to change the photo to black & white and take away from the plaid pattern, so I had to figure out a way to make the photo work with the colors in the Oakley Avenue collection. I decided it would work best, to cut all of the leaves from the Cozy Blanket patterned paper, instead of bringing in more color and pattern with other papers from the collection. This gave me a contrast between the colors in the photo and the colors in the patterned paper, that helped complement one another, instead of fighting with one another on the layout.

Instead of cutting all of the leaves as solid shapes from the Cozy Blanket paper, I also cut the outline of a few of them from White cardstock. Then I backed the open leaf design with the solid leaf cut from the patterned paper. Once all of the leaves were cut, I arranged them in a scattered look and machine stitched each one to my White cardstock background. Since these leaves gave me two layers, I folded up the edges to create a fun dimensional look on the layout.
I wanted to keep the leaves uncovered, so I left a space on the bottom left for my photo. Then I used some of the Oakley Avenue die cuts scattered among the leaves and two flair buttons, layered over a couple of the leaves. I completed the layout with a bit of Black Color Shine splatters.
If you need a fun Fall collection to document your photos or use for your paper crafting projects, make sure you visit the Pretty Little Studio shop and check out the full Oakley Avenue collection!
This
post contains affiliate links, which means I will receive a small
commission from any purchases made from product clicks on this post.
PRODUCTS USED:
This
is a personal blog. All editorial content and projects are
intellectual property of ashleyhortondesigns.com. I do receive
compensation and material product from Pink Paislee to develop my craft
posts, but all ideas and opinions are my own.
This week on the Pink Paislee Blog, the Design Team will be sharing projects with a Leaves theme. I kicked things off yesterday, with a hand-stitched leaf look, using the Take Me Away collection from Paige Evans.
I knew right away what I wanted to do for the background of the layout… a
scattered, stitched leaf look. I decided to work with the Take Me Away
collection because of the embroidery floss color range, I could choose
to coordinate with the colors in the collection. I started with the teal
woodgrain paper and used my Silhouette Cameo sketch pens to draw the
leaf shapes from the Oakley Avenue cut file set from The Cut Shoppe. Then I used my paper piercer to punch quarter
inch holes along each leaf. I used 5 different colors of embroidery
floss to stitch over the leaf shapes.


When it came to the photo and embellishments on my layout, I created a
cluster. Since I had such pretty stitching in the background, I didn’t
want to spread out the other elements on my layout and cover up the
stitched leaves. I used pop dots to adhere my photo which helped in 3
ways: 1) it made it easier to attach the photo since I was placing it
over embroidery floss, 2) it added a dimensional look to my layout, and
3) it allowed me space to tuck some of the Take Me Away embellishments
under my photo.
There are so many fun ways to use a leaf design on your layout! If hand
stitching isn’t your thing, you could work with leaf die cuts or fussy
cut leaf shapes from some of your favorite Pink Paislee patterned
papers. I hope you’ve found some leafy inspiration today for your
upcoming layouts or projects!
Make sure you check out the Pink Paislee Blog all this week for lots of leaf inspiration!!
This
post contains affiliate links, which means I will receive a small
commission from any purchases made from product clicks on this post.
PRODUCTS USED: