This is a personal blog. All editorial content and projects are intellectual property of ashleyhortondesigns.com. I do receive compensation and material product from Hip Kit Club to develop my craft posts, but all ideas and opinions are my own.
I'm stopping in today to share my new layout for Hip Kit Club, using the July 2016 Hip Kit & Add-On Kits. I wanted to create a layered look on my layout, so I cut the heart shape from this month's cut file in 3 different sizes.
I used White cardstock from the Cardstock Add-On Kit. Then I cut each of the hearts again from Bella Blvd Whatever Is Lovely paper, Pink Paislee Fancy Free paper and Hip Kit Club Exclusive paper. I adhered each of the hearts to the White cardstock background, and then began embellishing with a mix of the Hip Kit Club Exclusive embellishments for July.
I tucked some of the embellishments behind the hearts and layered some over the top of the hearts. Once I finished adding all of the embellishments and my photo, I machine stitched around the edge of each of the heart shapes.
Don't forget to check out my new process video, for more on how the layout came together!
This is a personal blog. All editorial content and projects are intellectual property of ashleyhortondesigns.com. I do receive compensation and material product from Pink Paislee to develop my craft posts, but all ideas and opinions are my own.
This past week, the Pink Paislee Design Team shared projects using Grid Designs. I love using grids on my layouts! There are so many different ways to use them. You can use grids to add multiple photos to your layouts or just one like I did and still have plenty of room for your favorite patterned papers and embellishments.
I knew I wanted to do a symmetrical grid design for this layout, but wanted to do something a bit different with the layout title. So I hit Pinterest for some inspiration and found this fun design. I loved the way the letters were included in the squares and I wanted to recreate the look for my layout. I cut each of my squares from the Fancy Free 6×6 paper pad a bit smaller than 3×3″, so I could fit four squares across the layout. I used my Silhouette Cameo to cut the letters in the squares that I needed for the title, Book Lover.
I only had one photo for this layout since it was just snapped in a moment of reading at the library. I sized it to the same dimensions as the patterned paper squares and added one of the puffy stickers over the photo to make it stand out. I also wanted the title letters to stand out more, so I hand stitched around each one with embroidery floss that coordinated with the colors in the Fancy Free collection.
I finished the layout with a variety of embellishments including ephemera pieces, wood veneers, chipboard, and buttons. I liked that each of the square spaces had its own type of embellishment.
If you missed any of the projects this past week, head over to the Pink Paislee Blog to see how everyone used grids!
This is a personal blog. All editorial content and projects are intellectual property of ashleyhortondesigns.com. I do receive compensation and material product from Crate Paper to develop my craft posts, but all ideas and opinions are my own.
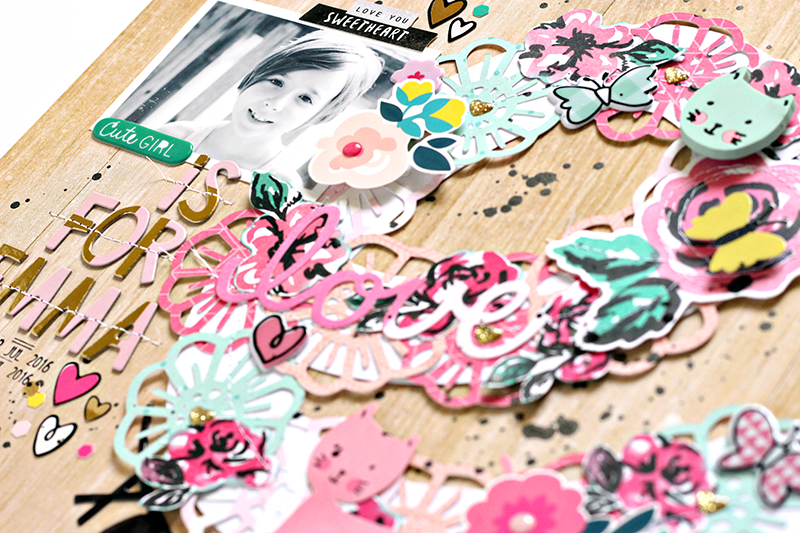
Did you get a chance to see the reveals for the newest Crate Paper collections, Cute Girl and Cool Kid? They are both amazing! I'm stopping in today to share a layout using the Cute Girl collection and at the end of this month, I have a layout that will be on the Crate Paper Blog, using the Cool Kid collection.
I could seriously use wood grain paper for the background of every layout! I knew the wood grain side of the Rainbows patterned paper would be perfect for my background. I wanted to create a large initial for my daughters name and cover it in florals, so the wood grain was a great balance to the mix of colors on the initial.
To create the initial, I cut a large E from White cardstock on my Silhouette Cameo. Then I cut several flowers from a mix of the Cute Girl patterned papers. I arranged them on the initial and then fussy cut a few more flowers from the Storybook patterned paper and layered them over the die cut flowers. Once I had all of the flowers in place, I machine stitched around the letter, to add texture and to secure the flowers.
I wanted to add more interest to the initial, so I mixed in some embellishments from the Cute Girl ephemera pack, puffy stickers, enamel dots and stickers. I finished the layout by placing the rest of the title under the photo. I used the Deer Thickers, and machine stitched through them, to give the title some texture.
If you missed the new reveals, visit the Crate Paper Blog! You can find Cute Girl HERE and Cool Kid HERE. And make sure you're following Crate Paper on social media to check out all of the amazing inspiration from the Design Team, using the new collections!
This is a personal blog. All editorial content and projects are intellectual property of ashleyhortondesigns.com. I do receive compensation and material product from Hip Kit Club to develop my craft posts, but all ideas and opinions are my own.
I'm back today with a new layout for Hip Kit Club, using the July 2016 Hip Kit & Add-On Kits. I can't resist a good circle design, so when I had the flower wreath idea for this layout, I knew it had to be in the shape of a circle. And who doesn't love to use flowers on their layouts...especially when they are cut from pretty paper! I mixed in some of the Hip Kit Club Exclusives with the flower cut file to create dimension and texture on the layout.
And I really love the Bella Blvd chipboard letters that are included in the July kit. They are perfect for your layout, as is, or you can alter them with spray mist, gelatos, paint, etc. I added a few embellishments from the Better Together collection from Amy Tangerine and some Project Life chipboard from American Crafts.
Once I finished up with everything, I asked my daughter's opinion on whether I need some Black spray mist splatters, and she said yes. :) So for the final touch, I splattered a bit of Black Color Shine on a diagonal inside the circle.
If you haven't had a chance to check out the July Kits, make sure you visit the Hip Kit Club website. And while you're there, you're definitely going to want to take a look at the August kits. They are filled with some amazing new products, and you're not going to want to miss out on getting the kits on your doorstep!
This is a personal blog. All editorial content and projects are intellectual property of ashleyhortondesigns.com. I do receive compensation and material product from A Flair for Buttons to develop my craft posts, but all ideas and opinions are my own.
Summer activities are in full swing, and most of our outside time is spent at the pool or splash pad. I decided to create a summer layout, with products and Flair Buttons that weren't really summer themed. The On Trend 2 collection from My Mind's Eye has some summer elements included, but it's not necessarily a summer collection. And since I have so many Flair Buttons in my stash from A Flair for Buttons, I decided to choose a couple that would work with my layout, but didn't have a summer design.
I went with two Flair Buttons for this layout. I chose one from the Words to Live By 1 set and one from the So Retro 2 set. They both coordinated with the On Trend 2 collection. The Believe flair was perfect for the cluster near my photo and I tucked the Let's Roll flair near my title. I have such a variety of Flair and it's fun to find different ways to use the themes of the buttons.
Don't be afraid to use your Flair Buttons outside of their typical theme. There are a lot of different ways you can incorporate them into your projects, even if they aren't an exact match for the project. Make sure you stop by the A Flair for Buttons shop to check out all of the new...and old...flair sets that are available!!
This is a personal blog. All editorial content and projects are intellectual property of ashleyhortondesigns.com. I do receive compensation and material product from Pink Paislee to develop my craft posts, but all ideas and opinions are my own.
Selfies are a scrapbookers best friend! Thanks to our phones (or IPads) and the Selfie Stick, it's so easy to snap photos anywhere and everywhere. All this week, the Pink Paislee Design Team shared Selfie projects on the Blog. I wanted to stop in and share the layout I had up earlier this week, using a family selfie and the Fancy Free collection by Paige Evans.
I started my layout with a cut file that had a cut and fold design. I liked that the cut file let me incorporate multiple patterned papers from the Fancy Free collection and it was also a circle shape which is one of my favorite shapes to use on a layout! After I added some machine stitching around the cut file, I placed my photo near the center heart of the cut file.
Next came the embellishing and I spared no embellishment! One reason I love a circle design is because of the space around the shape to add embellishments. I used a mix of the buttons, wood veneers, puffy stickers, and ephemera around the die cut circle. I wanted a large title to balance out the embellishing, so I used the Paige Thickers to create a vertical title along half of the folded cut file.
I finished the layout with a few embellishments to emphasize the photo. I used the big wood veneer arrow to draw attention to the photo and placed ephemera, chipboard, and puffy stickers around the photo to make it stand out. I also liked having the contrast of the black & white photo with all of the colors from the Fancy Free collection.
Selfies are perfect for your paper crafting projects, and they also give you a chance to get out from behind the camera and in your family photos!!
This is a personal blog. All editorial content and projects are intellectual property of ashleyhortondesigns.com. I do receive compensation and material product from Hip Kit Club to develop my craft posts, but all ideas and opinions are my own.
It's time to share a new layout for Hip Kit Club using the June 2016 Hip Kits! I used our June Subscriber cut file on this layout and our June Mood Board for a bit of inspiration. I grabbed the Simple Stories Sunshine and Happiness geometric patterned paper to layer behind the light bulb cut file. The diamonds on the Mood Board are a fun geometric shape, and they inspired me to go with the Simple Stories geometric pattern. I also loved the wood wall hanging and used the Hip Kit Club exclusive wood grain paper from the June 2016 Main Kit.
I also thought it would be fun to add some hand stitching with embroidery floss that coordinated with the colors in the Simple Stories paper. After I finished all of my stitching, I placed my photo and pulled out several ephemera pieces from our Hip Kit Club exclusives included in each month's kits.
I wanted to create some clusters with the ephemera pieces and placed them on the layout in a visual triangle. I wanted all of the embellishments and my title to be layered over the light bulb cut file. For the title, I used a mix of the Simple Stories letter stickers and Jillibean Soup Beanboard Alphas. I had fun mixing the cut file with the various ephemera pieces on this layout, and loved the way everything came together!
You can check out my new Process Video for more details on how the layout came together.
This is a personal blog. All editorial content and projects are intellectual property of ashleyhortondesigns.com. I do receive compensation and material product from Pink Paislee to develop my craft posts, but all ideas and opinions are my own.
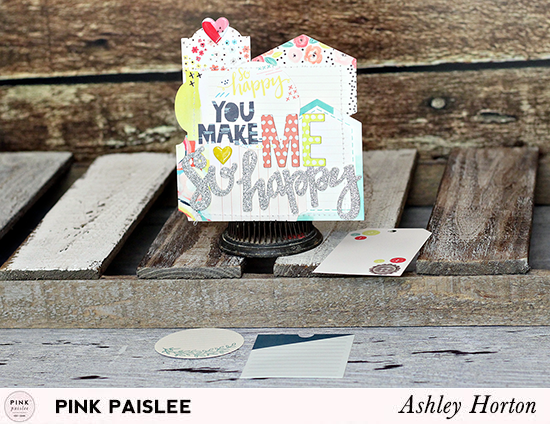
Take your journaling out of your hand made cards, and feature it on the front of your cards! There are some fun journaling tags included with the Pink Paislee Fancy Free collection by Paige Evans, that are perfect for adding a decorative journaling look to the front of your cards!
For my first card, I added the Favorites journaling tag to the front of the card. Before placing it on my card base, I journaled some “favorites” in the available spaces on the tag. The hand-writing on the front of the card adds a personal touch that you can’t find on store bought cards! I used pop dots behind the journaling tag to give it dimension. I liked having the dimension from the pops dots because it allowed me to tuck in some fussy cut flowers, stickers, and buttons.
On the second card, I continued using the journaling tags from the Fancy Free collection. This time, I thought it would be fun to use the tags as the design element on the front of my card. I cut my card base from cardstock and then arranged the journaling tags until I liked the composition. Once I had the tags in place, I added a bit of adhesive to hold them in place and then ran the card through my sewing machine to emphasize the handmade look and secure the tags to the card. I used a mix of hand cut letters and Thickers from the Fancy Free collection to add the sentiment to the card. And I completed the card with a couple of the cute puffy sticker hearts!
Both of these card designs were a bit different from what I normally create, but I loved the challenge of looking at journaling on cards in a new way. Don’t be afraid to step out of your comfort zone and find ways to use journaling in a different way on your next project!