Monday, September 29, 2014

Blinks of Life Guest Designer

I was so excited to receive an email from Natalia Bun, inviting me to guest design for Blinks of Life, using the October Kits, Cinnamon Roll and Sugar & Spice!  The kits have a great mix of patterned papers and embellishments, and I loved creating with them!  I completed a total of five layouts with the Kits, and wanted to stop in today, to share two of them with you.


This was actually my last layout, using the Kit and I wanted to make use of the awesome sticker sheet from October Afternoon.  I decided to repeat my photo and do a photo strip look, and then place the stickers down the side of the photo strip. I cut the large title from the October Afternoon patterned paper, using my Cameo and the Selfies & Usies cut file from The Cut Shoppe.

https://www.etsy.com/listing/199848087/the-selfies-usies-cut-file-consists-of?ref=shop_home_active_14


On this layout, I wanted to create a fun look, with the diamond pattern.  I cut squares from three of the patterned papers included in the Sugar & Spice Kit, and added them to the background paper.  I wanted to keep my title and embellishments clustered around the photo, to keep from covering up the diamond background.  And I used the pops of Red, to draw the eye around the page.

If you haven't had a chance to check out Blinks of Life, make sure you stop by for a visit and take a look around!  There are some amazing projects in the Gallery from the Design Team and other October Guest Designers!  And you can take a look at the Cinnamon Roll and Sugar & Spice Kits!

https://www.etsy.com/shop/TheCutShoppe?ref=ss_profile

Friday, September 26, 2014

Felicity Jane | Sugar & Spice

Yesterday, was new Cut File day in my Etsy Store, The Cut Shoppe and each Thursday, I share a new layout on The Cut Shoppe Blog using some of the cut file sets, that are now available in the Shop.  I wanted to stop in and share the layout on my Blog today, because I also used the amazing Charlotte Kit, from Felicity Jane to create my page!  If you haven't had a chance to check out the Charlotte Kit, make sure you visit the Felicity Jane website, for all of the info.


I really love the bold colors included in the Charlotte Kit!  They fit right in with my scrapbooking style.  And I especially love the touches of Black included in the Kit.  It always helps to add a great contrasting look on your layouts.  The mix of embellishments and Printables also give you so many options, for adding just the right look to your projects.

I still have lots more left in my Felicity Jane Charlotte Kit, so look for more layouts coming soon!

And if you would like to check out the cut files, I used on my layout, then make sure you visit The Cut Shoppe!  Here's a look at the two sets, that I used on my layout.

https://www.etsy.com/listing/204748627/the-and-then-background-cut-file-is?ref=shop_home_active_3
 
https://www.etsy.com/listing/204750217/the-now-i-know-my-abcs-cut-file-consists?ref=shop_home_active_2

https://www.etsy.com/shop/TheCutShoppe?ref=ss_profile

American Crafts | Inspired by...Shimelle Cards

This week on the American Crafts Blog, the Team has been sharing projects, based on all of the fabulous inspiration floating around out there.  I had two cards up earlier this week, using the Shimelle collection, and wanted to stop in and share them with you today!


How to: I love to mix a variety of colors and add in a touch of black! So for this card I used the Goodall patterned paper and the black alphas from the letter stickers pack to go along with the inspiration image I found on Pinterest. And to add interest to the sentiment I used the large No. 2 from the chipboard pack by mixing it in with my letter stickers.

Supplies: Shimelle (368136) - Goodall, Shimelle (368165) - Dimensional Stickers, Shimelle (368164) - Letter Stickers, Shimelle (368166) - Accent & Phrase Stickers


How to: I started my card by pulling colors from the Shimelle collection, based on the color scheme I found on Pinterest. Then I cut a cardstock base at 11 inches x 4.25 inches and folded it in half. Next, I cut a 5.5 inch x 4.25 inch rectangle from the Dowdy patterned paper and used it to cover the front of my card. I love the versatility of the Photo Overlays so I decided to use one as a pocket on the front of my card. I used a tiny attacher to adhere the transparency to my card, but you could also use machine or hand stitching. I placed one of the journaling cards cut from the Goodall patterned paper to use as my card sentiment and finished it with stickers from the letter stickers pack.

Supplies: Shimelle (368158) - Dowdy, Shimelle (368139) - Hurley, Shimelle (368164) - Letter Stickers, Shimelle (368166) - Accent & Phrase Stickers, Shimelle (368171) - Photo Overlays

Make sure you visit the American Crafts Blog, to check out all of the amazing work that the Design Team shared over this past week!!

https://www.etsy.com/shop/TheCutShoppe?ref=ss_profile

Thursday, September 25, 2014

Hip Kit Club | Fall Days

I hope you are getting a little taste of Fall, wherever you are!  We've had some great weather and temperatures lately...just wish it would stay like that all year round!  Since I am in the Fall spirit, I have a new layout to share with you today, using the September 2014 Hip Kit & Add-On Kits from Hip Kit Club, with a Fall theme.


Fall is my favorite time of year, so I start snapping photos, as soon as the pumpkins come out! There are some great colors in the September 2014 Hip Kit & Add-On Kits for creating a Fall page. I used the ombre cork side of the Crate Paper patterned paper for my background. Then I layered some fussy cut flowers, chipboard and tags behind my photo. I wanted to also make use of my Gelatos, so I colored over two of the wood veneers and used a wet paintbrush to smooth out the color. I finished my page, by cutting the Fall Days title from the Free Falling cut file from The Cut Shoppe and added some machine stitching for an extra touch of texture.

https://www.etsy.com/listing/203884788/the-free-falling-cut-file-includes-6?ref=shop_home_active_7

If you have friends or family going on an extended trip or kids going away to college, you can put together a quick card, with the September 2014 Hip Kit & Add-On Kits. I used the Just Go sentiment from the Studio Calico wood veneer pack, and paired it with the Chipboard Globe from the MME Market Street Chipboard Element pack. I kept my embellishing simple and added a chipboard star, enamel dot, and arrow and star from the MME Metal Shapes pack. And I used a zig zag stitch at the top and bottom of my card, in Black, for a nice contrast.


Don't forget to stop by the Shop, to pick up your October 2014 Hip Kit & Add-On Kits!!  Make sure you get them, before they sell out!! 

https://www.etsy.com/shop/TheCutShoppe?ref=ss_profile

Sunday, September 21, 2014

Creative Scrappers #278 | I Am Batgirl

Today is reveal day for Sketch #278 on the Creative Scrappers Blog!  And sadly, it's my final layout for the current Team members!  I would love to stay on CS forever, but decided not to reapply for the new call, to squeeze in more time to work on things for The Cut Shoppe...and homeschool for three busy kids definitely takes up a lot of time!!  But I had fun creating with the last Sketch, and just had to do a Halloween layout with it!


Layered grid designs are always awesome, and I decided to use two of the spots for photos and two for 3x4 cards from the House of Cards cut file set, from The Cut Shoppe.  

https://www.etsy.com/listing/203070858/the-house-of-cards-cut-file-includes?ref=shop_home_active_1

I loved the little tag area, so I layered a tag behind my paper and embellished with a Flair Button from A Flair for Buttons, some stickers, stars, and sequins.

Make sure you play along with Sketch #278, for the chance to win from our Sponsor, My Creative Scrapbook!  You could also be chosen for our Wednesday Featured Layout post!  Link up on the Creative Scrappers Blog, by September 30th!

http://www.mycreativescrapbook.com/kits.htm

And don't forget, that you can pre-order your copy of Creating with Sketches V3 by October 15th!!  Creating With Sketches will feature a few designers you might now from our past design teams! Missy Whidden, Nicole Nowosad, Sherri Funk, Monique Liedtke, Debbi Tehrani, Delaina Burns, Marielle LeBlanc, Tina McDonald, Tracy Banks,  Sara Zenger, Heather Leopard, Mary Ann Jenkins, Rebecca Keppel, Ashley Horton, Shannon Morgan and so many more!

http://creativescrappers.blogspot.ca/2014/09/creating-with-sketches-v3-preorder.html

Supplies:  Patterned Paper, Stickers, Sequins, Thickers, Wood Veneer, & Tag:  American Crafts; House of Cards Cut File:  The Cut Shoppe; Flair Button:  A Flair for Buttons; Color Shine:  Heidi Swapp; Die Cut Machine:  Silhouette Cameo

https://www.etsy.com/shop/TheCutShoppe?ref=ss_profile

Friday, September 19, 2014

Echo Park | Creative Agenda Cards

Earlier this week, I was up on the Echo Park Blog with two cards featuring the Creative Agenda collection!  This is one of my new favorites!  I love all of the fun colors and the awesome embellishments that go along with the collection!  This collection is perfect for creating everyday cards for the special people in your life.  And you can add an extra wow factor to your cards, by using the coordinating Designer Dies!


I used the cute stamp handle Designer Die from the Sweet Memories Die/Stamp Set on my first card.  I cut the die four times on different patterned papers and then arranged them in a grid on my card base.  I added a sentiment sticker under each of the stamp handles and finished my card by stamping the “Noted” sentiment, and adding stickers from the Element Stickers Sheet for my card sentiment.


On my second card, I repeated a similar technique using the heart shape from the Sweet Memories Die/Stamp Set.  I layered five hearts over my card base, and added the “Is It Friday Yet?” talk bubble, as the sentiment for my card.  Then I used the days of the week stickers from the Alpha Stickers Sheet, to embellish each of the heart shapes.


I love to use the Designer Dies on my projects, because you can create so many different looks each time you use them.  And you can pair them with the coordinating stamps to create even more fun looks!

Check out the Products page on the Echo Park Blog to see all of the fun Designer Dies and Stamps, that coordinate with the Echo Park collections!

https://www.etsy.com/shop/TheCutShoppe?ref=ss_profile

Thursday, September 18, 2014

Hip Kit Club | Explore Everyday

Today I'm stopping in to share a new layout and card for Hip Kit Club, using the September 2014 Hip Kit & Add-On Kits!!


I love the look of an angled design, and actually did a similar look on one of my layouts for Hip Kit Club earlier in the year. But I find a diagonal striped paper, helps me get motivated with this type of design, rather than trying it on another type of paper. The Crate Paper patterned paper gave me guidelines for placing my photos and elements on the layout. I started my page, by adding the wood veneer word "Explore", from Studio Calico to the center of the page. Then my photos and embellishments fell into place from there. I also wanted to continue my diagonal lines, so I used some of the awesome Glitter Washi tape, included in the September 2014 Embellishment Kit.


Woodland animals always look adorable on projects, and there are lots of cute ones included in the September 2014 Hip Kit & Add-On Kits! I wanted to use the Deer patterned paper from the Brighton Pier collection from Studio Calico on a card. And of course, it gives you a perfect sentiment to work with...You're a Deer! I arranged my title and chipboard heart embellishment around the Yellow deer, to add emphasis to the theme of my card. And I stitched through the alpha stickers, for an extra layer of texture!

If you haven't had a chance to pick up your September Kits, then make sure you visit the Shop, before they are all sold out!  And the October 2014 Hip Kit & Add-On Kits are already available in the Shop and they are amazing!!  Here's a look at the Main Kit!

http://www.hipkitclub.net/october-2014-main-kit


 Make sure you visit the Shop to see all of the October 2014 Add-On Kits!!

https://www.etsy.com/shop/TheCutShoppe?ref=ss_profile

Wednesday, September 17, 2014

American Crafts | School Days Photo Tray

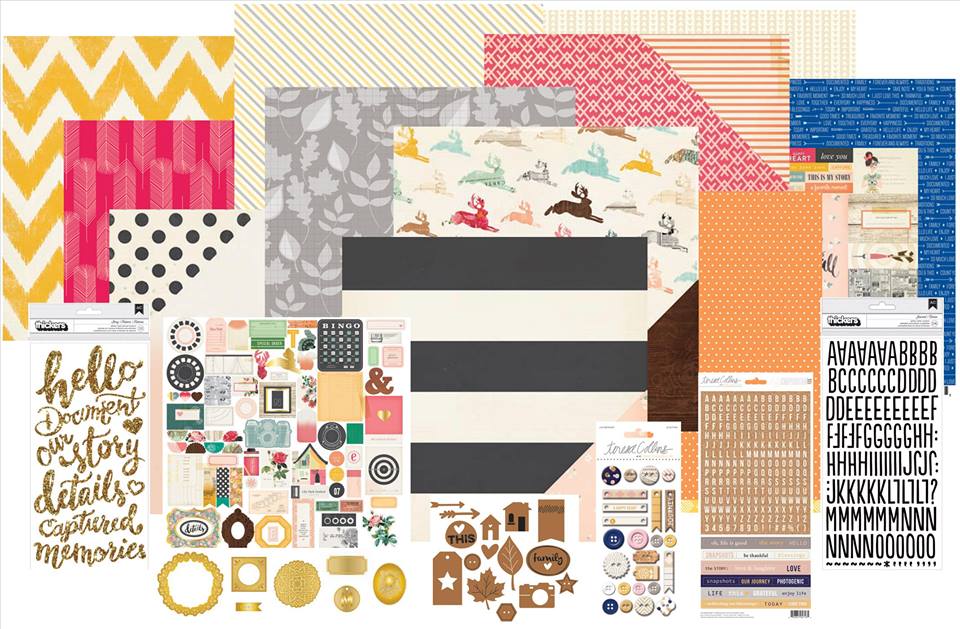
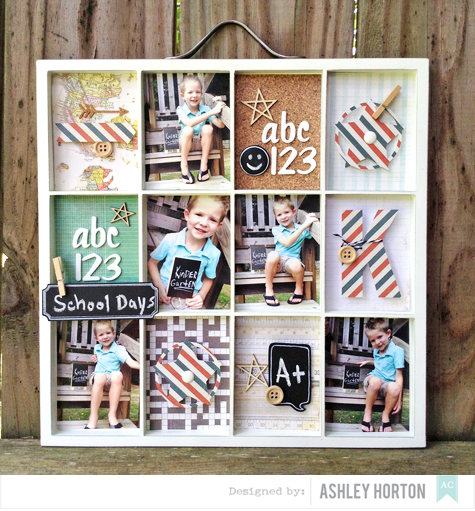
This week on the American Crafts Blog, we are sharing projects and layouts using 5+ photos!  I am usually a 1 to 2 photo kind of girl, so this was a little different for me!  And I had a project, so it was definitely out of my comfort zone!!  But I love the end result and have the Painter's Tray hanging in our son's bedroom.


Supplies: DIY Shop (366665) - 12x12 Paper Pad, DIY Shop (366983) - 6x6 Paper Pad, DIY Shop (366611) - Wood Buttons, DIY Shop (366620) - Wooden Clothespins, DIY Shop (366633) - Chalk Badges, DIY Shop (366623) - Chalk Labels, DIY Shop (366634) - Chalk Speech Bubble Stickers, DIY Shop (366631) - Cork Stickers Arrows, Thickers (366057) - Collage

I also have a tutorial to share with you, showing how I put my Painter's Tray together.

1. You need a Painter's Tray and the DIY Shop 6x6 Paper Pad to get started. If you don't want to purchase a Painter's Tray for your project, check out the Silhouette Store for shadow box cut files.

 
2. After you choose your papers from the 6x6 Paper Pad, cut each one to 2.75x3.75. Then you can add adhesive to the back and place them in the spaces on the Painter's Tray.


3. I chose 7 papers to fill the spaces on my Painter's Tray, so next I printed 5 photos for the remaining spaces and added them to the tray.


4. Now you are ready to embellish your Painter's Tray! Choose a pack of Thickers and add "ABC" "123", to one or two of the spaces in your tray.


5. I wanted to add a chalk element to my project, so I used some of the Chalk Labels, Stickers and Badges from the DIY Shop collection. The chalk goes on easily and this is a great way to personalize your project.


6. Add your handwritten chalk embellishment to the spaces on the tray and embellish with wood buttons and wooden clothespins.


7. Use your Silhouette Cameo to cut letters or numbers for your child's coordinating Grade and school themed die cuts. If you don't have an electronic die cut machine, you can use stickers or Bits to embellish your project.


8. Add dimension to your die cuts, using pop dots. I wanted some of the die cuts to stand higher, so I layered two pop dots, to get more dimension.


So if you're looking for ways to get your children's school photos out of albums and on display, then I hope you'll try this fun Painter's Tray look!


https://www.etsy.com/shop/TheCutShoppe?ref=ss_profile