Thursday, June 28, 2012

Going in Circles!

It's another Fabulous Friday at Frosted Designs and we have a fun challenge coming your way this week!!  We are asking you to use CIRCLES on your layouts or projects!  There are so many fun possibilities with this challenge!!  I decided to use some negative cut circles on my layout, and here is what I came up with:


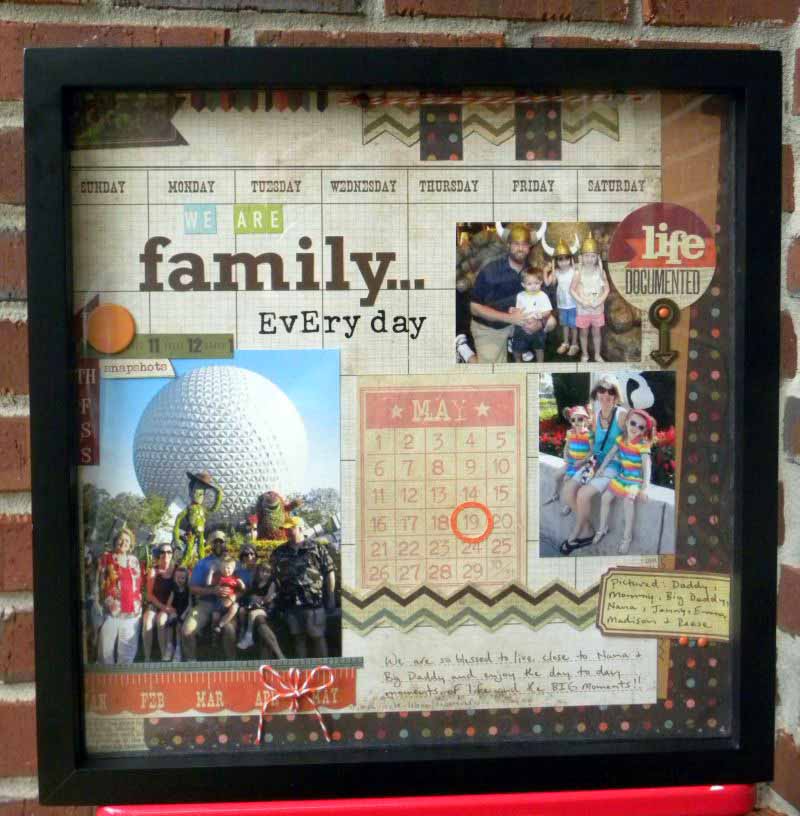
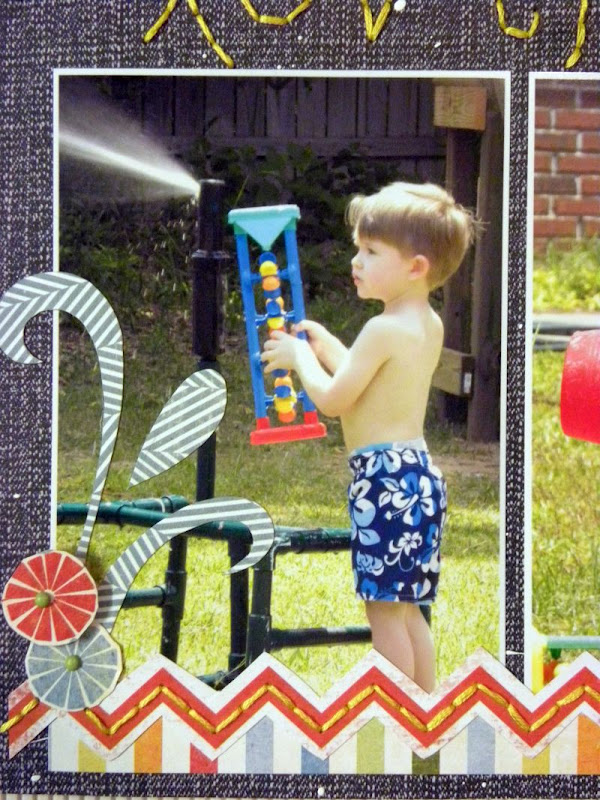
I have found a new love for my Cricut Expression lately and I decided to cut the border strips along the left hand side of my page and then use the Expression to cut all of the circles.  I used the centers of some of the smaller circles, to add back to the center of a few of the negative spaces, once I attached my paper to the layout.  I didn't want to create the same exact mirror effect on the right side of my page, so I decided to balance out the circle design by adding the View Finder sticker from Echo Park's Note to Self Collection.

I was pretty amazed that I got this shot of my hubby and the kids on Father's Day morning.  If you had seen us right before this was taken, you probably would have thought we were a crazy family!!  :)  We were trying to rush around and get everyone ready for church, but we wanted to sit down for a minute to give daddy his Father's Day gift.  With all of the chaos that had been going on minutes before, I was so in awe of how serene they all looked in this photo.  This is probably one of my favorite photos taken to date of my hubby and the kids.  I was very excited to get this one scrapped, and a little intimidated on how the end result would turn out, but I am definitely in love with this layout!!  :)

So, make sure you come play along with us this week and link up for your chance to win an awesome prize from our fabulous sponsor, Mold Muse!  If you get a chance, head over the check out Mold Muse and leave them a little love and thank them for being one of our generous sponsors!

Products Used:  Patterned Paper:  Echo Park & Crate Paper; Stickers:  Echo Park; Font:  Arial Black; Brads:  The Paper Studio; Acrylic Paint:  Apple Barrel; Button:  Dill-Button; Wood Veneers:  Studio Calico; Other: Tag 

Monday, June 25, 2012

The Great Outdoors

It's only been 4 days since my last Blog post, but for some reason, it feels more like weeks!!  :)  I am definitely not lacking for pages to share, but lately everything I have, has been for DT work.  It will eventually get revealed, but I already have pages ready for Get It Scrapped! for our August assignments!!  :)  It's really hard to keep them under wraps for so long.

But, I had time to work on a layout, that isn't for any of my DT assignments and I get to post it today!  I created this layout for two challenges.  The first is one of my favorite challenges, the May/June Issue Challenge #8 at Club CK.  Our challenge this week was to use a tree element on our page.  And the second challenge is a fun one, from ScrapFIT.  The challenge for Workout #70, is to develop your own Polaroid.  Here is the page that I created, by combining these two challenges:


I have to admit, that sometimes there are layouts that I'm just not that happy with in the end...but fortunately, this isn't one of those!!  :)  I was fairly excited when I finished this one, because it actually turned out to be the exact copy of what I had envisioned before starting the page.  I used the trace feature on my Expression to cut out the tree and then added three circles in various sizes behind the branches.  I wanted to add a little more umph to my tree, so I stitched around each of the circles with a matching embroidery floss.  I used some of my Instagram photos to create my Polaroids.  The Instagram photos are great for this technique, because they are already square shaped.  I just printed my photos at 2.75x2.75 and then cut out extra white space at the bottom of each photo.


I think one of the easiest and fun ways to scrap some of your photos, is by creating a scene on your background.  It helps reinforce the theme of your photos and gives you a quick and easy page design.  Scenes are great for beach photos, Holidays (especially Christmas), outdoor photos, birthday photos, and many more.  So take a little time on your next layout and see what kind of scene you can create to go along with your photos!


Products Used:  Patterned Paper & Stickers:  Echo Park; Thickers:  American Crafts:  Mr. Huey's Spray Mist & Wood Veneers:  Studio Calico; Button & Washi Tape:  My Mind's Eye; Washi Tape:  October Afternoon; Baker's Twine:  The Twinery; Clothes Pins:  Canvas Corp; Brads & Eyelets:  The Paper Studio; Edgers:  ProvoCraft; Embroidery Floss:  Janlynn
 

Thursday, June 21, 2012

Sweet & Sassy!

Thanks for stopping in today!!  I am sharing my monthly post for my LSS, ScrapHappy Pensacola.

Today I have two layouts to share, using the same collection, with just a little different twist on each of the pages.  Every year there is at least one or two collections that come out at CHA, that make me think, "I must have all of this one!".  The Neapolitan line from Dear Lizzy was one of those lines this year!  The colors and patterns are really amazing and from the chipboard embellishments/titles to the vellum/ruffled papers, you really can't go wrong with this one.  The colors in this line are a little more on the pastel side, but have a tad more saturation than your normal pastels.  Just enough to umph them up!

Since I had a lot of the papers from this line and Christy let me play with some of the chipboard shapes and the garland titles, I wanted to create two layouts with the same products, but with a little different look and feel on each.

For my first layout, "For the Love of Dance", I chose to keep the look softer and cleaner...sweet if you will.  


These photos of our daughter were taken after her dress rehearsal and they were two of my favorites from the day.  I really wanted the focus to be on the photos.  Pairing the black and white photos with the soft colors in this line, really make them pop on my page.  I also didn't want to over-embellish or have a lot of 3D elements on my page.  There are several papers in this line that are really great for fussy cutting.  I cut several elements from one of these papers and used them to create a free form grid around my photos.  And I even created a little pocket for my journaling, with one of the fussy cut pieces.  I mixed in some die cut words and Thickers with the garland title and then finished off the page by adding several of the chipboard shapes.  I also thought it would be cute to add two little clouds that were fussy cut from the vellum paper.  One of the quickest ways to adhere vellum is by stapling.  It adds a little more texture to your page and just a touch of whimsy!

On this second page, I got a little more messy.  Christy, pretty much has Scrapbook heaven in the store right now, because it is packed with so many American Crafts products!!  One of which, being the completely awesome Mister Huey's Circle Mask from Studio Calico.  I actually bought this for myself and knew I had to try it on this layout.


I placed the mask on my paper, where it would be positioned mostly behind my main photo.  Then I used some of the Tattered Angels Glimmer Mist ( Polka Dot Pink) over the mask and my page.  Once the mist dried, I added my photos and the title.  I used another Mister Huey's Mask in a different way for the title.  I took the large ampersand and traced it and then cut it out.  I outlined the ampersand with a fine point brown Zig pen and placed it behind the garland title.  To finish off the title, I used a mix of Thickers and sticker letters.  I also used more of the vellum paper on this layout, and used it as a strip across the top of my page.  And to give it a little more dimension, I added one of the clouds from the chipboard pack.

I hope you have enjoyed my little post on using collections in two different ways.  So don't worry about losing control and buying too much of one line...there are lots of great ways to get layouts from the same products, but have a totally different look and feel to those layouts!  And Christy has everything you need in the store, to create the looks I shared on my layouts today!

Products Used:

Patterned Paper, Chipboard Shapes, Garland Titles, Letter Stickers:  Dear Lizzy/American Crafts; Thickers:  American Crafts; Mister Huey's Mask:  Studio Calico; Spray Mist:  Tattered Angels; Baker's Twine:  The Twinery

Monday, June 18, 2012

Get It Scrapped! Tangerine Tango

***If you are here for the Frosted Designs Crafting Room Blog Hop, please click HERE.***

I am excited to stop in and share one of my first article assignment layouts for Get It Scrapped!.  You probably saw my first layout, that was shared HERE on the Get It Scrapped! Easy Scrapbook Pages site.  Today's layout was posted on the Get It Scrapped! Blog, this past Thursday.  In this article, Scrapbooking with the Color Orange, you will find some great information on the following topics:  Orange Dominating, Orange Drawing the Eye, Orange Guiding the Eye, and Orange Accenting.  There are some amazing layouts from the Creative Team, which demonstrate using each one of these techniques.  

On my layout "Funny Face", I chose to use Orange as an accent color.  


Orange is not the dominant color on my layout, but I used it as an accent, to guide your eye in a visual triangle.  Your eye is drawn to the Orange hearts at the top of the layout, where I placed my title and then moves to the photo, which is highlighted with the large Orange brad.  And finally your eye moves to the Orange scalloped border at the bottom of the page, where I placed the envelope that holds my journaling.  I also combined orange, pink, and green in a split complementary color scheme, which you can learn more about HERE.


And in case you were wondering why Orange is so popular this year...it was chosen as Pantone's 2012 Color of the Year.  So you will see it popping up in Fashion and also in the Scrapbook world.  I hope you will find a way to use Orange on an upcoming layout or project and that you will share it with us in the Gallery at Get It Scrapped!


Products Used:  Patterned Paper, Thickers, Envelope, Flair:  American Crafts (Amy Tangerine); Acrylic Stamp:  Close to My Heart; Ink:  Stampin' Up; Brads:  The Paper Studio; Embroidery Floss:  Janlynn; Edgers:  ProvoCraft; Other:  Toothpick

Friday, June 15, 2012

Frosted Designs Crafting Room Blog Hop

Welcome to the Frosted Designs Crafting Room Blog Hop!!  

 
You should have arrived here from Sassy's Blog.  If not, go back and start out at Frosted Designs, so you can visit each of the DT members' Blogs.  When the idea first came up to do this Hop, I wasn't immediately on board, because I didn't think my space was "fancy" enough.  But then I reconsidered, because I know a lot of Ladies who make do with sharing their kitchen or dining room tables as scrap areas or play rooms/offices with their children and husbands.  Or some just work on the floor!!  My space may not be featured in Better Homes and Gardens, but at least I have a designated area, that I can use anytime I need to!!  :)

First up is a picture of what my desk looks like when I am working.  And I would say that my desk is only about 50% of messy in this photo...it has seen much worse!!  :)


We were also asked to share at least one organizational tip, but I have several that I will share along with my photos.  These first three pics are just some general shots of my craft space.  It looks like mass chaos...but it is organized chaos!!  :)


I saw this fun idea for brad storage a while back, but can't remember the Blog where I originally saw it.  But, I thought it was so cute and had to give it a try.  Just pick up a cork board at any of your local office or craft stores and use it to stick in all of those brads you have.  It is an easy way to find what you are looking for and it makes a great little decorative piece for your space.


I have to admit that I have a "slight" addiction to Thickers and teeny alpha stickers.  My collection started growing pretty fast, so I had to find a way to store them, but also have easy access.  Thank goodness for the clip rings at Michael's!!  These are awesome, because you can slide all of your Thicker packs or Alphas onto the clips and then clip them to whatever spot works for you.  And the best part is, you can just flip through your packages, open up the bottom, and slide out your Thickers.  Once you are done with them, just slip them back into the package and you never have to take the ring down.


And last up, is a great way to upcylce and find storage for your scrappy supplies.  I am pretty frugal about spending money on "pretty" storage, because I would much rather spend my money on scrappy supplies.  So one idea I've found, for storing buttons and small items, is recycling Crystal Light containers.  The larger packets come in these great cylinder containers, with pop on lids.  I just keep them right at hand on top of my shelf and when I go to a crop, I can pack them in my bag without worrying about them spilling everywhere!


I hope you enjoyed your visit to my Scrappy Space and that you maybe picked up some ideas for your own space!!  Next up, you'll be off to visit Brenda's Blog.

Here is the line up for the entire Hop, in case you get lost along the way:


Thursday, June 14, 2012

Trends: Ombre & Smashing!

One thing I love about the Scrappy World, is all of the fun trends that pop up in crafting.  I would not consider myself a "trend-setter", but I love keeping up with new trends and incorporating them into my layouts.  

Something that has been popping up recently, is the Ombre trend.   "Ombre (with an accent over the e) is defined as having colors or tones that shade into each other."-quoted from the ScrapFIT Blog.  I've been wanting to give this a try and lo and behold, there were two Ombre challenges posted this week on two different sites.  ScrapFIT is hosting an Ombre challenge for their Step Class #5 and Sheila shows you a fun way to incorporate it into your layout.  Club CK also has some Ombre inspiration on their Pinterest challenge this week, so I thought it would be great to do one layout for both of these challenges.


I used the Ombre in two ways on this page.  I knew I wanted to use this technique somehow on my title treatment, but couldn't decided how to do it.  I thought the easiest way would probably be to use my Desktop Publishing program.  So I used the rectangle tool to draw 6 shapes across my page and then I varied the shades of blue for each box.  I moved each of the boxes right below one another, to have a solid rectangle shape with no white spacing showing.  Next, I opend WordArt and used the Arial Black font to type the word "raindrops".  Then I selected a thicker line for the word, turned the line white, and cleared out the center of the letters so the ombre background would show through.  I decided to print the word out on photo paper for a more glossy look and then just cut out each of the letters.

For the second treatment, I took some inspiration from the fabulously talented Amy Tan.  She has an awesome video on her Blog where she uses the Studio Calico Chevron mask and some Mister Huey's spray mist, to whip up a totally adorable page.  I didn't have the chevron mask on hand, but I have the cute circle mask (my friend and I bought one of the circles and one of the chevron, so we could swap them out when we get together for crops)!  So, I used the circle mask on a white background and sprayed the upper part with Sun Kissed Smooch Spritz and the lower part with Carrot Cake Smooch Spritz.  After my mist dried (which it does pretty quickly), I just cut it out into a rectangular shape and used it as a layer behind my photo.  

Products Used:  Cardstock:  The Paper Studio; Patterned Paper:  Bella Blvd.; Circle Mask:  Studio Calico; Smooch Spritz:  Clear Snap; Mini Alphabet Stickers:  MLS; Thickers:  American Crafts:  Fonts:  Arial Black & CK Emily; Washi Tape:  Heidi Swapp; Baker's Twine:  The Twinery; Button:  Michael's; Rhinestones:  Close to My Heart; Pen:  Sharpie

The second trend that has popped up is SMASH Books.  This trend has been out for a little longer, but I hate to admit that I've had my book sitting on my desk for about 6 months and I've just now started using it!!  Smashing is a little difficult for me, because the randomness is something that I have trouble with.  I am usually always in layout zone, where I have to have some kind of structure to my page with photos, title, and journaling.  So, working on my SMASH book is somewhat out of my comfort zone.  But, I FINALLY got a phone that works correctly and lets me download all the cool kid apps - which meant I was able to get Instagram!!!  :)  I thought this would be the perfect motivation to start working in my SMASH book.  So far, I've only completed three pages, so here they are:


It will definitely be a work in progress, of letting go of my preconceived notions on having every page "perfect", but I think I'll get the hang of it as I go along.  When these little baby's first came out, it was pretty hard to get your hands on one.  But if you are thinking about getting into the SMASH craze, you can now pick up the books and accessories at Michael's and Hobby Lobby.  The books usually run around $12.99 and most of the coordinating products are anywhere from $2-$4.  There is a lot of fun stuff to go a long with the books, especially the teal washi tape and the black & white polka dot washi tape!

And just one last thing to share today:  Frosted Designs will be hosting a Crafting Space Blog Hop starting Friday, June 15, at 6PM (CST).  Come join in the fun and check out all of the Creative Spaces for the Frosted Designs Team Members.  There will also be organizational tips and some giveaways hosted at the various Blogs.  I hope you will stop by to check out my space and see where all of my crafty "magic" happens!!  :)


Tuesday, June 12, 2012

Creating Keepsakes July/August Issue

If you are an avid Scrapbooker like me, and you subscribe to Creating Keepsakes magazine, then I am sure you are on the edge of your seat every two months waiting for the newest issue to hit newsstands!  Well, I am happy to say, that the wait for the July/August issue is over and you can pick it up TODAY!  Every issue is always packed with the latest amazing products and more inspiration than I know what to do with...and this issue is no exception!  You will find several great Feature Articles in this issue:

"My Hero"
"School's Out for Summer"
"Sweet Teen Scene"
"One for the Gallery Wall"


And I must say, that I am even more super-excited about the July/August issue, because I have THREE layouts appearing in this one!!  A big shocker for me!  I was waiting for the issue to come, so I could really make sure they were in there!! HA!  :)  

The first layout, won the Reader's Pick Poll, thanks to a lot of you who are my faithful Blog readers for your votes.  This layout was actually my first DT layout for Frosted Designs and I just wanted to have a lot of fun with it and create a great Summer look.

  
"As seen in the July/Aug 2012 of Creating Keepsakes magazine.  Copyright Creative Crafts Group.  Posted with prior permission from the publisher."

These next two layouts were done for an assignment I received from CK.  They both appear in the article "One for the Gallery Wall".  This was a really fun assignment, because I was asked to create two different layouts, using photos from a vacation.  The focus of one of the layouts needed to be about the vacation and the focus for the other had to be family, but used in a frame.  I chose to do a layout for the second part of the assignment and purchased one of the black 12x12 frames.  These are great, because you can display your layout as wall art and most of these type frames have different levels to set your glass, depending on the height of your embellishments. 

 
"As seen in the July/Aug 2012 of Creating Keepsakes magazine.  Copyright Creative Crafts Group.  Posted with prior permission from the publisher."


 "As seen in the July/Aug 2012 of Creating Keepsakes magazine.  Copyright Creative Crafts Group.  Posted with prior permission from the publisher."

So, this is just a little taste of what you will find in the July/August issue.  If you are not a Subscriber, you'll definitely want to pick this issue up at your nearest store.  Or better yet, become a CK Subscriber and have it delivered right to your door!  


Friday, June 8, 2012

Summer Lovin'

Happy Fabulous Friday everyone!  I love that Frosted Designs posts a new challenge every Friday, because I know we all want to get some scrapping done over the weekend!  Our challenge this week, is STITCHING (you can use machine stitching or hand stitching).  I thought it would be fun, to use my stitching in a little bit of a different way than I normally do.  Here is what I came up with:


I thought it would be fun, to hand stitch part of my title.  I hand wrote the word "lovin" and used a paper piercer to poke holes around the outline.  I chose to use yellow embroidery floss and back-stitched over the word.  A very easy technique, that adds a little bit of texture and whimsy to your layout or project.  I also added a little bit of stitching to the chevron border, for a little added interest.

Don't miss playing along with this week's challenge!  You will have the chance to win from our awesome sponsor, Prairie Bird Boutique.  And I hope you will take a minute to visit our Sponsor and leave them a little love.  We are so thankful for our weekly sponsors and their willingness to offer up great prizes to our participants!


Products Used:  Patterned Paper, Stickers, Buttons, Twine, & Word Banner:  My Mind's Eye; Thickers:  American Crafts; Punch:  EK Success; Acrylic Paint:  Apple Barrel; Pen:  Sakura; Embroidery Floss:  Janlynn; Brads:  Bazzill


Thursday, June 7, 2012

My Angry Birds!!

This is the phrase that I hear, usually everyday, from the time our just recently turned 3 year old wakes up until the time he goes to bed - "I WANNA PLAY MY ANGRY BIRDS!!!".  He has developed a "slight" addiction to all things electronic...video games, computers, phones, the DVR box - pretty much anything with buttons and lights on it!  Before making it to the ripe old age of 3 last Friday, he already knew how to turn on the computer and open up Angry Birds Rio all by himself.  We usually keep him barricaded out of our room with baby gates, because once he starts playing, it's an ugly site when he has to stop.  Screaming, tears, tantrum all ensue for up to 30 minutes afterwards!!  :)  So, being the life-documenting Scrapbooking mommy that I am, I had to make a page about this little addiction!!


Since I am caught up on my DT work...at least for the moment...I thought it would be fun to incorporate some challenges into this layout.  The Weekly Challenge at Studio Calico, was to use 5 or more photos.  I printed all of these as wallets, which made it easy to fit them all on a single page and still have room to embellish the layout.  MME had a great challenge up, to use fussy cutting.  Now, you may be thinking, "what in the world did she fussy cut on this page??".  I cut the hexagon borders and the chevron borders from two of the MME patterned papers.  I know, not my most extravagant fussy cutting...but, fussy cutting none the less!!  :)  And the last challenge on this one, is the May/June Issue Challenge #6 at Club CK.  The challenge this week, was to use TABS.  I traced and cut out the three kraft tabs to use as labels on two of my photos and for the pull on my journaling spot.  The full journaling reads:

"You are an Angry Birds ADDICT!!  It is probably an unhealthy addiction, because you would play all day if we let you!  All day, you say, "I wanna play my Angry Birds!"  You're actually pretty good @ it.  You even ended up beating Daddy's high score on this level by a thousand points!  I guess you are an Angry Birds prodigy!"

If you missed my first layout for Get It Scrapped! Easy Scrapbook Pages, you can check it out HERE.  My second assignment will be going up on June 20.  And be sure to check back tomorrow, because we will have a fun Fabulous Friday challenge going up at Frosted Designs!!  You won't want to miss it!

Products Used:  Patterned Paper, Brads, Stick Pins, Journaling Tag:  My Mind's Eye; Thickers:  American Crafts; Font:  Arial Black; Embroidery Floss:  Janlynn